If you’re like me, you probably have a knack for underestimating the depth of rabbit holes. This was one that I knew could get a little hairy, and I’m not out of the woods yet. I’ve been playing with the STM32F103C8T6 blue pill board and the JGAurora A5S board with a STMF103ZET6 chip. Here is a little of what I have learned so far…
To run Arduino code on STM32 based boards, we need a few things:
- Arduino code
- A compiler that understands what to do with arduino code
- A way of getting that code onto the board
I’m going to tackle these one at a time.
Meet HAL
Arduino was designed for Atmel ATMEGA processors. The Arduino framework is really just C code, with a lot of varnish on top to make things easy and shiny. However, this ‘varnish’ was specifically written with Atmel ATMEGA AVR processors in mind.
Now that we want to program for a new CPU, we need a special library of code, that can take what we write in Arduino language, and fill in the gaps to make it work on the STM32 platform. This is what is known as a HAL, or “hardware abstraction language”. Fortunately, someone already has done the hard part of writing a HAL for Arduino on STM32 – known as STMduino.
Now for the bad news:
- Firstly, there are two completely different HAL libraries out there, and it matters which one you pick.
- They have the same name, or rather, the name of the old one was given to the new one, to be nice™.
- Code that was written for one HAL library, may not work on the other HAL library.
- The old HAL library is being seen as ‘complete’ and is unlikely to see major changes.
- The new HAL library does not yet have reliable support for all the additional libraries that the old HAL library supported.
- The old HAL had a nice community forum. That’s sadly in the process of being shut down.
These two HAL libraries are :
(a) Arduino STM32 for Maple and (b) STM32duino by ST
Generally, I have seen people recommending that you migrate to the official HAL (b) released by ST – the manufacturer of STM32 chips. However, this may be inconvenient, and the shortage of documentation frustrating enough, that it may be signficantly easier at present to use the older HAL (a).
You can add these HAL’s to the Arduino IDE by adding two repositories to the Additional Boards Manager URLs section, found in the Arduino Preferences. The URL’s you need to add are the following, depending on the HAL you want to add:
a) http://dan.drown.org/stm32duino/package_STM32duino_index.json
b) https://github.com/stm32duino/BoardManagerFiles/raw/master/STM32/package_stm_index.json
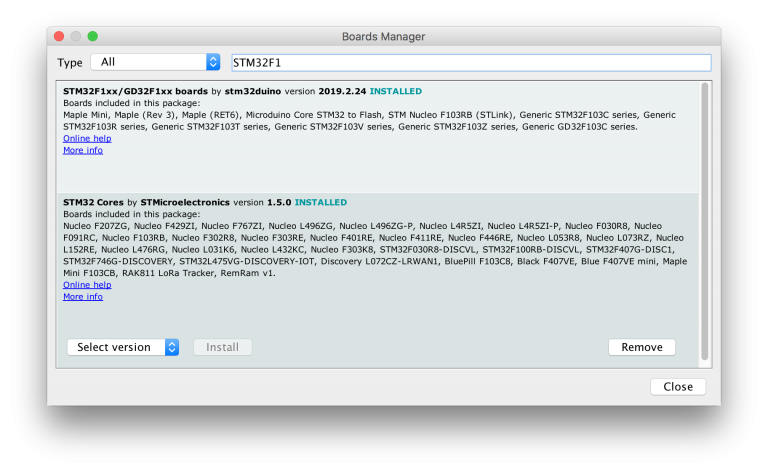
After you have added these URL’s to the Additional Boards Manager, you can then open the Boards Manager. Search for “STM32”, and you will find the relevant options to install the desired HAL.
 Now, you can compile code for your STM32 chip. Huzzar! Onto the next problem….
How to get code onto your STM32 board.
There are two ways I recommend.
- ST-Link V2 USB adapter
- USB to Serial adapter (and DFU mode)
Depending on the HAL library you use, the platform (Mac, PC, Linux), the current temperature and humidity, you may find that only one of these options works reliably for you. I’m sorry. I recommend you try to get both options working, so that you likely end up with at least one method that works.
1. ST-Link V2 USB adapter.
To use the ST-Link, there may be some drivers you need to download to get this to work from the ST website. For a mac, you can also install stlink on the homebrew platform. When it works, the ST-link is a very reliable method of flashing the STM32 chips. ST has flashing software for windows (STM32 ST-LINK Utility) that works every time, and offers some very useful features.
I didn’t have success with the ST-Link in the arduino IDE on Mac, as I got errors:
ERROR /Users/kuwatay/src/stlink-master/src/common.c: map_file() == -1
stlink_fwrite_flash() == -1
the selected serial port stlink_fwrite_flash() == -1
does not exist or your board is not connected
However, I was successfully able to flash compiled binaries that I exported from Ardunio IDE using stlink on Mac instead, as I mentioned above.
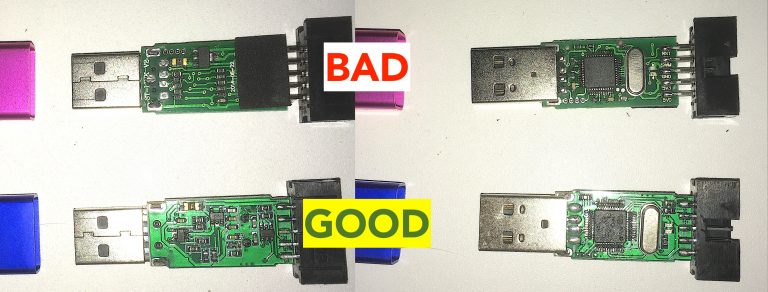
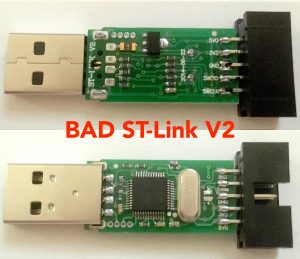
Unfortunately for me, the ST-Link adapter I bought at first, seemed to work and happily talk to the computer, but refused to communicate to any chip I tried to use it with. If you’re having problems with your ST-Link, and it looks like the top adapter in the image below, buy another one. The bad one was purchased a few years ago, so I imagine you are unlikely to end up with a bad one today… (PS: the colour does not matter).
2. USB to serial adapter
The STM32 have a permanent bootloader, that through a combination of BOOT0 and BOOT1 pins, can be used to force the chip to accept new code from the UART TX/RX port pins on the chip. You will need a USB serial port adapter (3.3V, not 5V!) to interface between these pins, and your computer.
You MAY need to flash a new (non-permanent) bootloader to your chip to program them over serial reliably.
On a PC, your serial adapter will create a COM port with a number attached that you can find in device manager. On Mac, you will see a serial port starting with “cu.” or “tty.” when you “ls /dev” in a terminal. On a Mac, if you use the CH340/CH341 adapter, then you will likely need the paid drivers from mac-serial-usb – just pay the money, and be grateful you don’t have more headaches – please trust me on that one! The FT232 and PL2302, CP2102 chips have better (free) driver support on Mac than the CH340.
Both of the HAL’s come with software that is capable of talking to the STM32 over serial. This software is called stm32flash. However, the version that actually comes with the HAL’s doesnt work – at least, it doesn’t work on Mac, but it works out of the box on Windows! If you have a problem flashing via Serial port on Mac, then you will need to find the broken stm32flash binary file and replace it with a good one. For the Arduino IDE, after you install the HAL, you will find the broken one is in one of (or multiple of):
- ~/Library/Arduino15/packages/stm32duino/tools/stm32tools/2019.2.24/macosx/stm32flash/stm32flash
- ~/Library/Arduino15/packages/STM32/tools/STM32Tools/1.2.1/tools/macosx/stm32flash/stm32flash
- ~/Documents/Arduino/hardware/Arduino_STM32-master/tools/macosx/stm32flash/stm32flash
To get the fixed version, you need to install homebrew:
In a terminal type:
/usr/bin/ruby -e “$(curl -fsSL https://raw.githubusercontent.com/Homebrew/install/master/install)”
Then install the working version:
brew install stm32flash
You will find the working version in the brew cellar, probably in:
/usr/local/Cellar/stm32flash/0.5/bin/stm32flash
I recommend you create a symbolic link at the old location, that points to the working stm32flash in the brew cellar.
Once you do this, to flash, you need to put your STM32 device into bootloader mode, resetting with the BOOT0 pin high. Then you can flash using the Serial mode in your Arduino IDE.
PlatformIO
PlatformIO is a new extension, compatible with both VS Code and Atom that turns them into a fully fledged IDE for IOT development. It is powerful, and can actually save you time, but it also has limited documentation, and a learning curve that may cause a lot of frustration. I recommend looking into it, it is a powerful and much improved IDE replacement for the Arduino IDE. Install VS Code, then install Platformio, and then in PlatformIO you can install the STM32 HAL’s you desire.
A note on PlatformIO on Mac: on a Mac you may find bugs not picked up on PC! This is because PlatformIO (unlike Arduino IDE) uses your system’s native compiler, called Clang, rather than GCC. This different compiler may trigger some bugs to be picked up as errors that GCC simply tolerates.


I found your post after encountering the same “common.c: map_file() == -1” error.
Not content to just manually running command to flash the file I did a bit more investigation.
The Arduino IDE makes a call to:
%INSTALLDIR%/arduino-1.8.8/hardware/Arduino_STM32/tools/linux/stlink_upload
This is a bash script that makes a call to the st_flash tool:
$(dirname $0)/stlink/st-flash write “$4” 0x8000000
The problem is the Arduino IDE is only passing a single argument (the name of the compiled binary blob) so the $4 should be $1.
I’ve also checked the OSX version and it has the same flaw, changing the $4 to $1 and it’s successfully flashing for me. To comfirm in a safely put echo at the start of the line and the Arduino IDE will just echo back the command you can copy and paste into bash.
Thank you for taking the time to troubleshoot this further! Nice job!
And here I am in 2021 completely confused by the whole thing. It seems almost no one actually knows what an “Arduino” is.
For sure it can be confusing! Part of the problem is that quite a few products decided that they liked how easy the Arduino IDE was, so decided to make boards compatible with it. The second confusion comes that a number of things that used to be Arduino projects have moved over to VS Code, and there are others that have created Arduino IDE forks for their own benefit. Not to mention the confusion between 8bit and 32bit Arduino boards, or the confusion around 5V and 3.3V boards… 😂